Possible to project Shapes as range/ability indicators onto uneven ground?

Hello, I am quite a unity novice and just started using Shapes for UI elements (which makes it game look amazing btw, very crisp!) so warning! I might have some knowledge gaps.
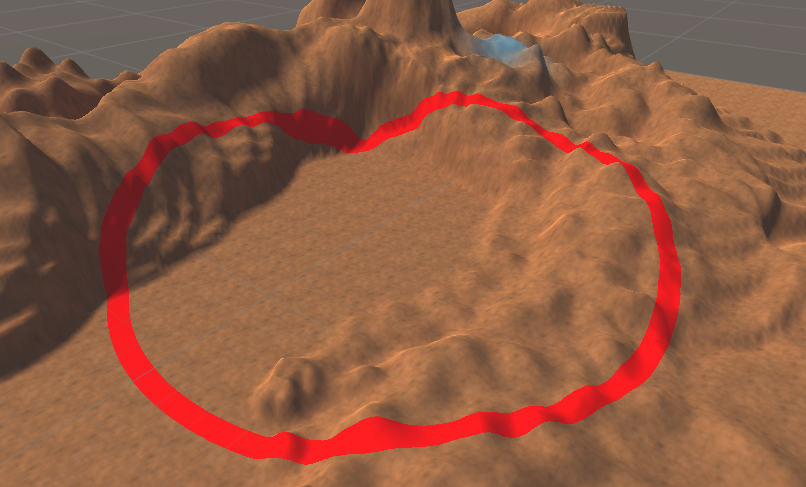
I'd like to use Shapes to made range indicators or line-of-sight indicators for my 3D game and overlay them onto terrain or other objects, similarly to how RTS games have selection indicators for each unit or MOBA games have tower range indicators.
Is this something I can do with Shapes? And if so, what's the general approach?
I've done a bit of research and found this is mostly achieved with projectors or shaders and I even found an old tweet showing off a decal system with similar functionality!
The only Shapes related example I could find was from Reddit, someone showing off a very good example however, the ground in the video is flat and doesn't have the issue of conforming to uneven terrain so.. apples and oranges.
Further scouring led me to find that Shapes won't support custom shaders so is that a dead end? or is there a way to make this work?


One solution would be to use a Projector alongside a Camera + Render Texture setup.
If you follow this path, you will need to download Unity's Standard Assets pack, as it contains shaders for use with the Projector. I should also say up-front that I haven't tested this setup with Shapes specifically, but the setup itself is functional for a few different use cases.
1. Create a Render Texture asset.
Give it a decently high height/width resolution, eg: 2048x2048. This is important for keeping everything crisp and clean.
2. Create a Material asset.
This will be used for the Projector.
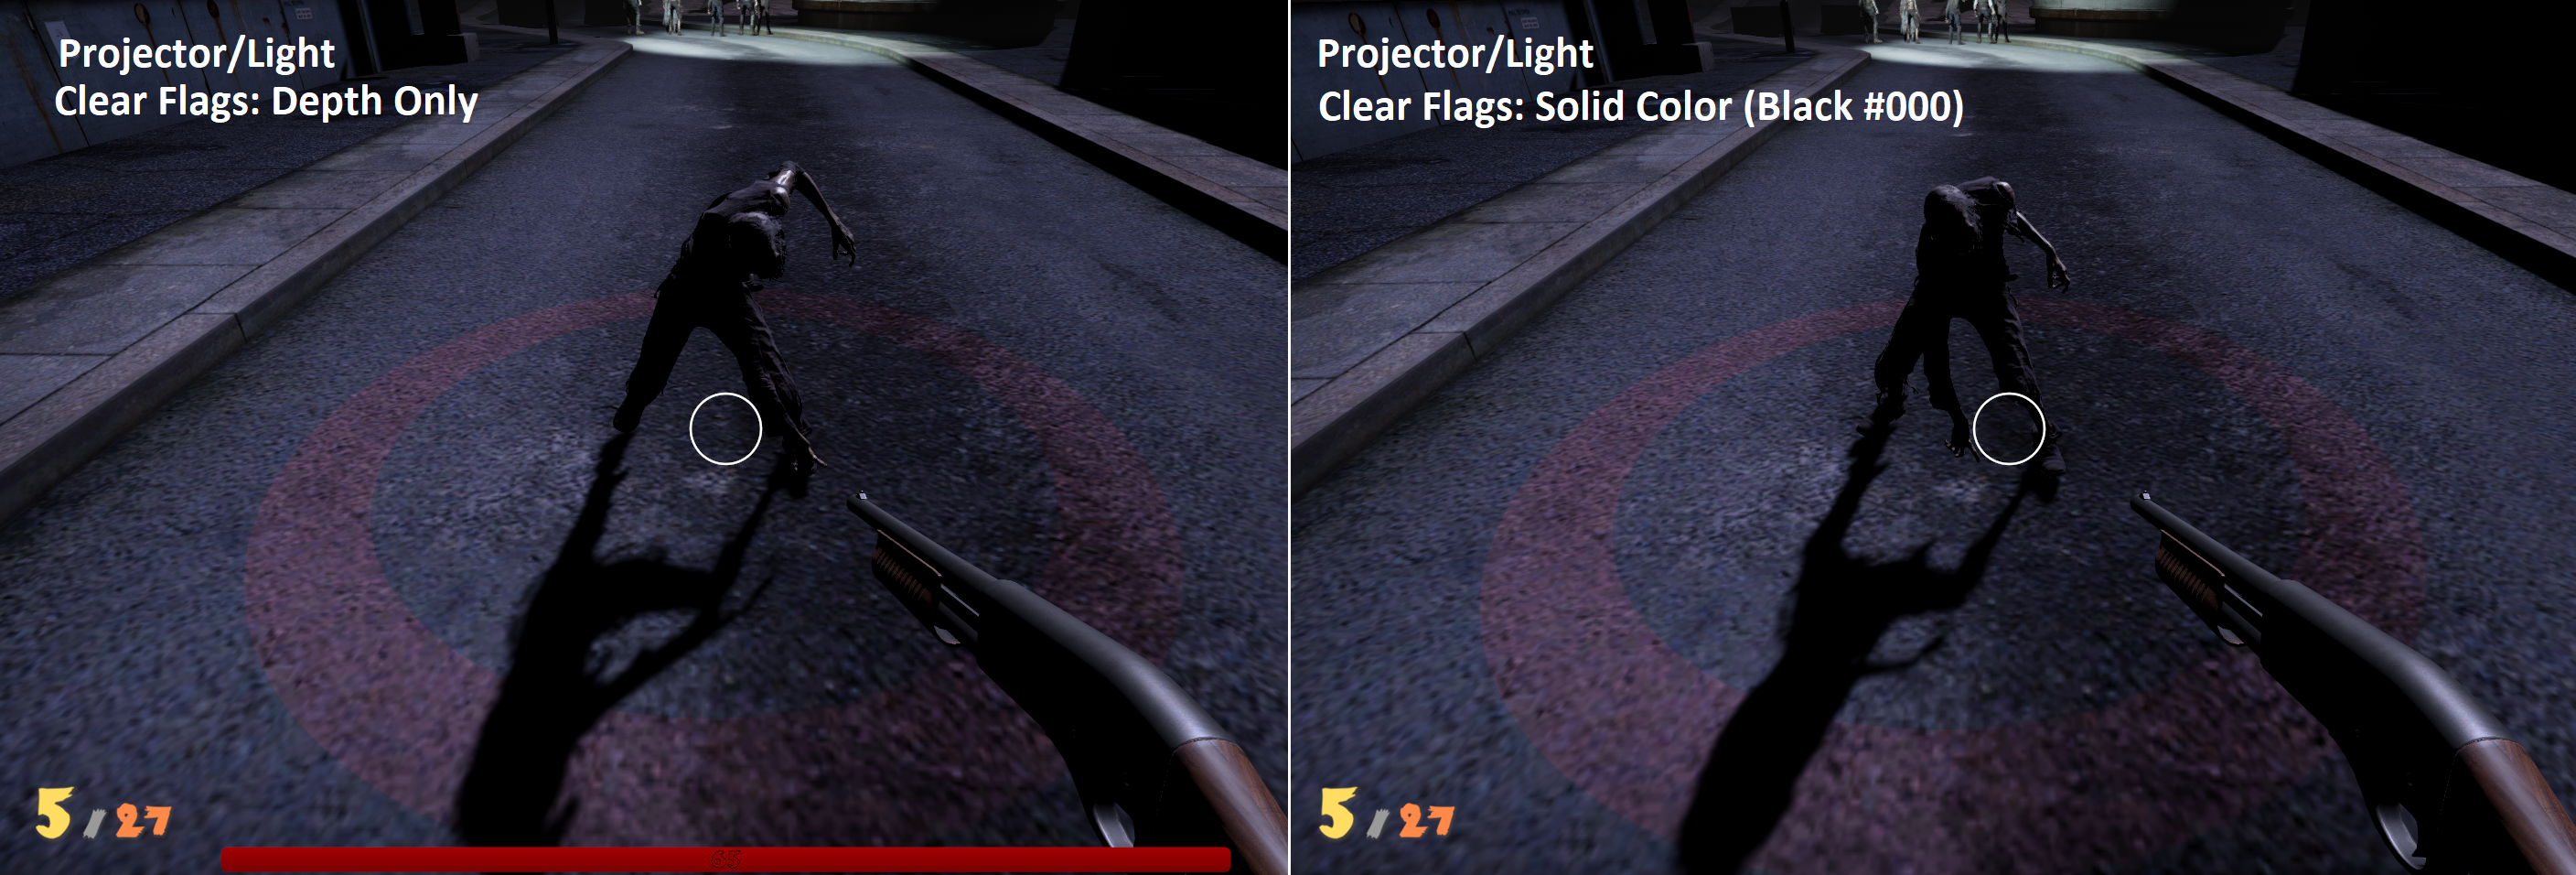
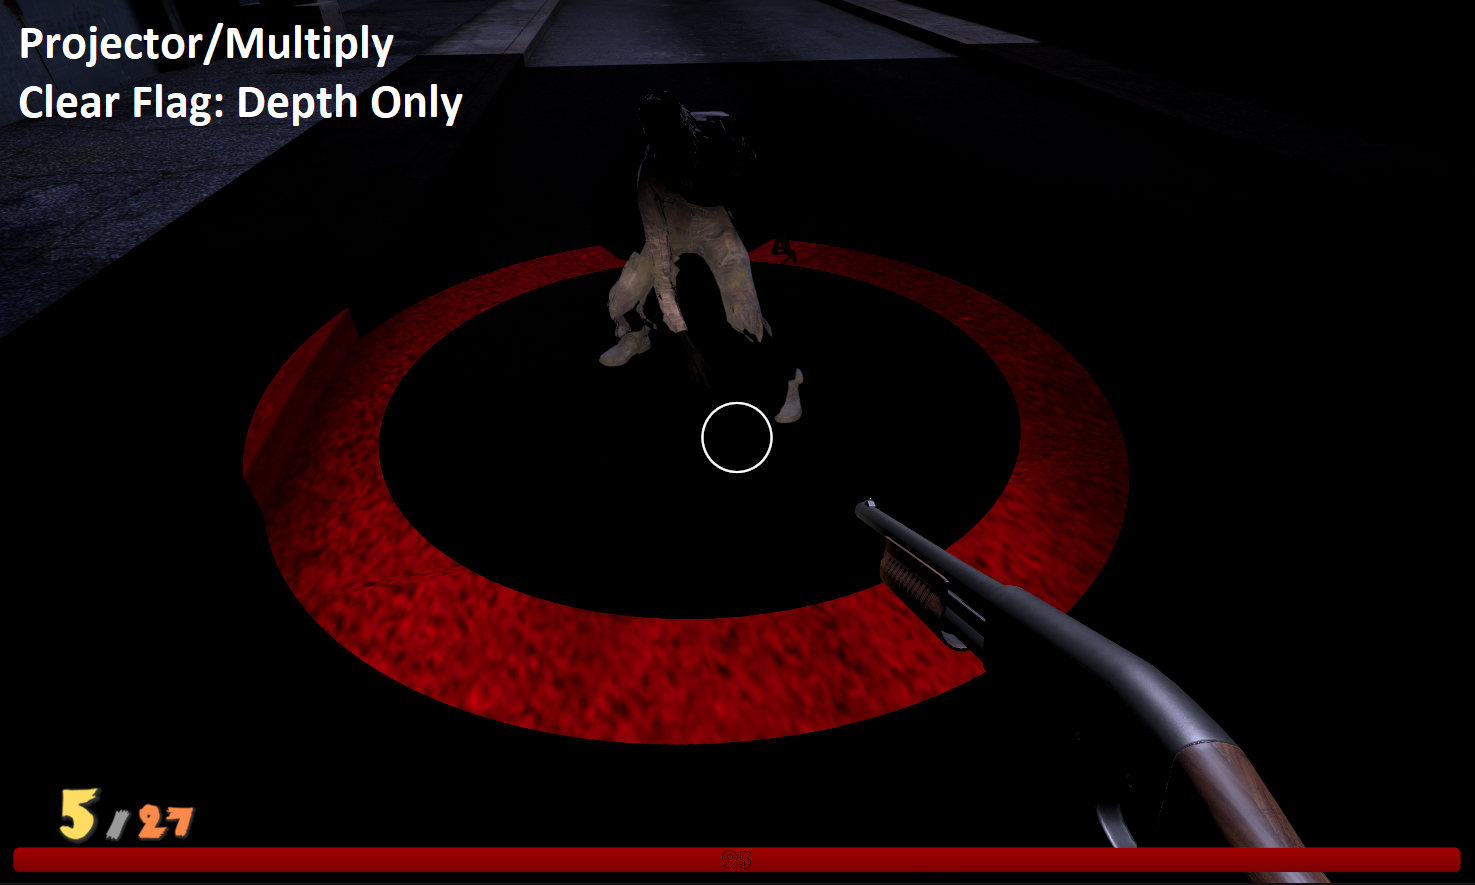
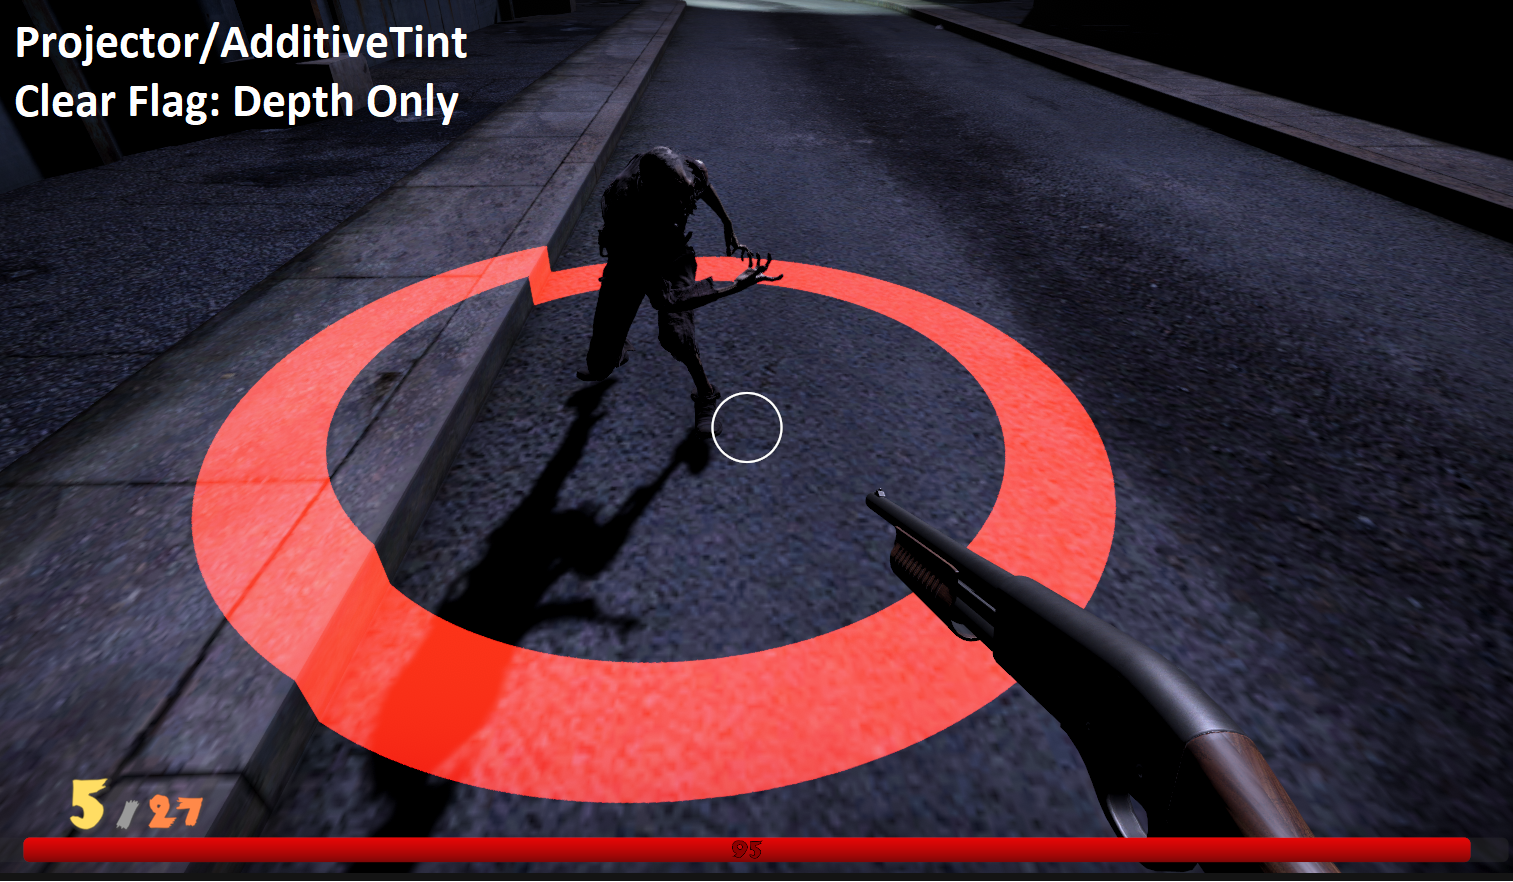
Use one of the two newly-added Projector shaders from the Standard Assets pack: "Projector/Light" or "Projector/Multiply". The difference between them is how they blend with surfaces, Additive (Light) or Multiply blending.
For the "Cookie" texture, select your Render Texture asset.
3. Create a new Shape.
Your Shape will need to be assigned a Layer. I recommend creating a custom layer specifically for visuals that you intend to project onto your environment.
4. Create a new Camera, and place your Shape in front of it.
This Camera will capture your Shape, to be projected onto your environment
Your Camera will need a few settings:
Clear Flag: Set to "Solid Color" or "Depth Only".
Background ("Solid Color" only): The color you need to select here depends on your Material asset. Use Black (#000) if you are using the "Projector/Light" shader, or White (#FFF) if you are using the "Projector/Multiply" shader.
Culling Mask: Set this to the Layer that you assigned your Shape to. You only want to check the Layers that you want to project onto your environment.
Perspective: You will probably want this set to "Orthographic".
Render Texture: Select the Render Texture that you created earlier. This tells the Camera to output to the Render Texture, instead of the Scene view.
5. Create a Projector.
This is where it all comes together! Make sure your Projector is positioned where it needs to be for your use-case, whether that's above your player, your environment, or anything else.
Your Projector will need a few settings:
"Orthographic" checkbox: Set this to Enabled/True.
Orthographic size: Set this to the maximum size that you expect your Range to be. You will need to set more settings below before this setting is useful to you.
Material: Select your Material asset from earlier.
Ignore Layers: This setting has the opposite effect of "Culling Mask". Here, you're selecting layers that you do not want to project onto. Make sure that you uncheck your environment layers.
With all this set up, you should be able to alter and animate your Shape. The results will be rendered to a texture, and cast down onto the environment by the Projector.